Wednesday, February 29, 2012
Day Twelve
Problems problems. New problem today. The UVs of the exported simulation kept moving about, resulting in the textures swimming around. After trying all manner of weird things trying to solve it, like deleting all the attributes, exporting the inside and outside groups separately, for the whole afternoon, I finally found the solution! It was to place a UVtexture node just after the voronoi fracture, before it went into DOPs. I suddenly thought of this solution when I realised the UVs only moved when the objects were moving around in the simulation. Hence it must have been caused by DOPs. AND it worked! FINALLY! Hopefully there won't be anymore problems tomorrow and we'll still be able to make the deadline. :D
Monday, February 27, 2012
Day11
Finally got the simulations out of Houdini and into Maya! To do this, I Roped the simulations out, read them back in and arranged the 3 simulations (for shot 17) to fit the shot. After that, the baked simulation was exported to Maya via the FBX. The stairs and ground were fine, however the golem kept giving an index out of range error. Mr Ron suggested deleting all the piece groups and import the outside and inside group separately. By doing this I found out the error was due to the inside faces.
After doing some googling, I found out that dividing the mesh would solve the problem. I did it, and sure enough, it imported nicely into Maya. There was also a normals problem with the pieces created by the voronoi fracture. To solve this I did a harden edge on the edges. Mr Leong also suggested using the set to face option for an instance where the harden edge didn't resolve the problem.
All that's left is to texture the inside faces and it'll be rendering time!
For another shot, a close up of the rock on the ground vibrating, I used a sine expression on the rotate channels to get some nice shaking going without needing to keyframe it. Expressions for the win!
Saturday, February 25, 2012
DOP dop dop
From DOP, I tried POP, now it's back to DOP again, with some POP thrown in. The cracking simply couldn't be done in POP, it looked way too bad.
In order to control which pieces would move and which would remain static, I modified the method Mr Ron taught for getting the centers of each piece of the voronoi fracture. In the for each node, I added a group node, creating a "static" group. I then used the move and static groups to copy the moving and static pieces separately, then creating primitive groups for them, and finally merging both nodes together. This was required as the group coming into the foreach node was a point group. I could then feed the groups into the dopnet as different types of rbd objects.
In order to maintain the inside and outside groups after exporting to Maya, I assigned separate constant shaders to the inside and outside groups, so the faces could be selected based on shaders. The rop and time tools were pretty useful for reversing the simulation of the golem breaking apart so it would look like it was forming instead.
The simulations are pretty much done, all that's left is to combine them nicely according to the live plate. Then it's off the Maya for rendering!
Friday, February 24, 2012
Day Nine
Where do I start? So many things happened today. Some things have been completed. First, the Golem mesh has been finalised. Thanks a lot to Mr Leong, who suggested using the polyreduce node to downres the mesh. This maintained the rough shape of the geometry but with a lower poly count.
I've also managed to get the simulation of the golem forming more or less working, using a particle system and a few groups to divide the particles into left and right groups. They would then be blown in different directions and affected by two different orbit nodes. I got the first group easily. This group, called fly, would group particles with a moving bounding box. I then created a second group with another bounding box, called fly_right, with fly as the source group. In order to get the left group, I had to jump through some hoops. I couldn't use not equals to fly_right, as that would give me the non-flying particles too. I then created a nonfly group on the first group node, and did an intersect with not equals to fly_right on the second group node. This gave me the fly_left group. I could then manipulate them as I liked.
This simulation would then be cached out and read back in backwards, then blended with the ones with the stairs and ground cracking and chunks rising.
Thursday, February 23, 2012
Day..... eight?
The shots have been matchmoved! At last! Albeit with some jittering. Progressed has also been made on the golem and fracturing.
For the golem, Mr Ron showed how my rockgen asset could be used on all the pieces of the golem at once. the displacement could then be baked onto a texture (using an asset from the Exchange) that would be applied to the model at render time. All this to allow me to work without my viewport hanging for a minute everytime I press spacebar. However, the baking did not turn out as expected. The UVs were all stacked on top of each other! To solve this, I separated the pieces into different groups corresponding to the arm, leg, etc, and merged and auto-mapped them in Maya before importing them to Houdini. They were then displaced and baked out individually. I guess there's no escaping these tedious tasks.. :(
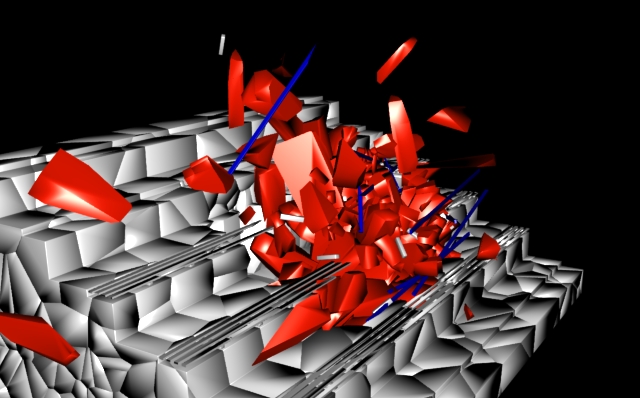
More progress has been made on the ground and stair fracturing simulations. The RBD sim was going way too slowly to be usable, so Mr Ron recommended using particles to drive the effect instead and set up a rough network using the foreach node.
So basically, what the network does is doing a for loop on each of the pieces created by the voronoi fracture, creating a point at its center. It also generates a stamp index ID, associating the piece with that particular point. These particles are then grouped and piped into a particle network. the output is then fed into another for each node which pairs each piece back to its respective point. And voila! We have our fracture, 100 times faster! However it's not as accurate, that's the price to pay. I tried to get back the same cracking effect by using a sphere to collide with the particles, so the pieces wouldn't just fall together.
This method also allows multiple particle systems to be combined together. I used the second system to raise the pieces out of the ground and have them in a sort of swarm, encircling each other. An orbit node was used, with a custom axis and radius generated for each particle based on its ID. This introduces a lot of randomness into the behaviour, without which they would all orbit in only one axis.
Thanks to Mr Ron for all the help!
For the golem, Mr Ron showed how my rockgen asset could be used on all the pieces of the golem at once. the displacement could then be baked onto a texture (using an asset from the Exchange) that would be applied to the model at render time. All this to allow me to work without my viewport hanging for a minute everytime I press spacebar. However, the baking did not turn out as expected. The UVs were all stacked on top of each other! To solve this, I separated the pieces into different groups corresponding to the arm, leg, etc, and merged and auto-mapped them in Maya before importing them to Houdini. They were then displaced and baked out individually. I guess there's no escaping these tedious tasks.. :(
More progress has been made on the ground and stair fracturing simulations. The RBD sim was going way too slowly to be usable, so Mr Ron recommended using particles to drive the effect instead and set up a rough network using the foreach node.
So basically, what the network does is doing a for loop on each of the pieces created by the voronoi fracture, creating a point at its center. It also generates a stamp index ID, associating the piece with that particular point. These particles are then grouped and piped into a particle network. the output is then fed into another for each node which pairs each piece back to its respective point. And voila! We have our fracture, 100 times faster! However it's not as accurate, that's the price to pay. I tried to get back the same cracking effect by using a sphere to collide with the particles, so the pieces wouldn't just fall together.
This method also allows multiple particle systems to be combined together. I used the second system to raise the pieces out of the ground and have them in a sort of swarm, encircling each other. An orbit node was used, with a custom axis and radius generated for each particle based on its ID. This introduces a lot of randomness into the behaviour, without which they would all orbit in only one axis.
Thanks to Mr Ron for all the help!
Monday, February 20, 2012
Day 6
Reshot the matchmove shots, hopefully they can be matchmoved. Also, did smore experimentation with the Voronoi Fracture to create the Golem forming effect.
Friday, February 17, 2012
Friday!
Most of today was spent attempting the matchmove for the first shot. It didn't work out, even though I tried it in SynthEyes instead of Matchmover. We have deduced that the problem lies in the nature of the shot, the nodal pan, as many matchmoving software have trouble with nodal panning. As a result, we have decided to reshoot the 2 shots. This time, we will ensure that there will be enough change in the parallax of the video. I've also realised that the markers are not very helpful in tracking. We might use coloured tape instead.
On a positive note, I've imported the mocap rig into Maya and adjusted it to fit the model. The animation seems to be pretty good!
-
I've also figured out how to use the Voronoi fracture in Houdini, with the help of Tanner. I'll experiment more with it.
On a positive note, I've imported the mocap rig into Maya and adjusted it to fit the model. The animation seems to be pretty good!
-
I've also figured out how to use the Voronoi fracture in Houdini, with the help of Tanner. I'll experiment more with it.
16 and 17 February 2012
For the past two days, I match move my shot and manage to get it working. I then import it to maya to test out wheather its moving or not. The i recreate the stadium by putting the benches and stairs and tested the ibl. We seem to have a problem with the ibl so we got no choice but to reshoot on mon and retry it.
Thursday, February 16, 2012
13/2/2012 - 16/2/2012
16/2/2012
For the past three days, I have been assisting with the edit, making sure the continuity is perfect , or at least close to perfect. It is continuity that is important in the world of editing. the second important factor is probably the timing. The edit have to be played continuously to make sure the timing is perfect.
Moreover, I guess i have started modeling the stadium or somehow tried to model. the problem is i cant find the dimsensions of the width and height of the CG object. The only option now is to use the measure tools to calculate the distance, which is pretty tedious.
15/2/2012
Today Ron Bernard taught us the basics of motion tracking with nuke by using a camera tracker node. There were many problems that occur in the tracking and the import. Automatic tracking wasn't a problem. But correcting them was.After tracking, I tried to import the fbx file into maya and found that there were a lot of problems with the tracking CG seems to be continuously sliding about in the scene. Moreover, the size of the trackers are huge, as there wasn't an option to tweak in nuke. The other problem is the grid, It was vertical and there wasn't an option to shift the grid in nuke.
Day Four
So today we went to reshoot, yet again. This time, we shot the matchmove and VFX shots first, so we wouldn't run out of time. like yesterday. However, the tracking doesn't seem to be going very well. Even NukeX couldn't track it well. This time I'll try using syntheyes to track it instead. Hopefully it'll give a better matchmove. The stitching doesn't seem to be going well too. The horizontal angles stitch fine, but the 45 degree up and down ones aren't stitching properly.
We finally had our first mocap session! It was fun!

 I also did some work on the rocks for the Golem mesh.It was imported and fed into the network, however the initial settings which worked for a simple box did not work quite as well for the Golem mesh. The edges were too sharp and had too much displacement. The settings were tweaked, and a turbulence noise was multiplied onto the worley and voronoi to soften the edges. I've also created a digital asset out of the network.


We finally had our first mocap session! It was fun!


Wednesday, February 15, 2012
Day Three: Even More Rocks!
So today we went to reshoot the entire movie, but with a fast SD card this time! There were some problems during the shoot today, like the sun randomly getting blocked by clouds, and some depth of field problems with the matchmove shots. For those shots, I increased the shutter speed and had to open the aperture wider to compensate, however this resulted in the markers being blurred out of focus. And it starting raining when we were almost done. And so we'll have to reshoot, again. Fun times. I was the director of photography for these two days but Praveen would be taking over tomorrow.
After giving some feedback to improve the shots, Mr Ron introduced us to camera tracking with Nuke. At last! No more Matchmover!
Some progress on the rock generator. I've added a crackle multiplied with turbulence noise for the little details. I was also experimenting with ways to have a flat top for the rocks. At first I tried grouping the top points together and exclude them from the subdivide and VOP SOP. However, I had encountered some strange stretching problems and it wasn't procedural. I then tried using a cookie, which kind of gave me what I wanted, but Mr Ron suggested a better, which was to use a clip , then group the unshared edges together and applying a polycap. This gave the stretching problem too, and we discovered that it was due to the face not having a normal. A group geometry node was used to procedurally select the last face, and add a normal to it in the Y direction. This gave me exactly what I needed.


HEHE

13, 14 and 15 february 2012
For the past three days, I did the story board and touch up on the storyboard to get the thing finalize. Then i find textures for the golem. On the 2nd day of studio project we went shooting for the test shot and im in charge of tracking the shutter speed, aperture and also focal length of the camera. When we reshooting and shots we have a brief settings to follow and use it. The third day we went to shoot again but due to the weather we have to reshoot it tmr. But for today i did abit of matchmove to test out the perspective but it didnt work so we have no choice but to reshoot.
:) Danial
:) Danial
Tuesday, February 14, 2012
Day Two: More Rocks! and test shots
After getting the animatic approved by Mr Ron, we carried out our test shots, to lock down the camera angles and carry out some matchmove tests. We were quite lucky to have decided to carry out the tests, as we realised that for some shots, Matchmover wasn't able to calculate the 3D points accurately due to the nodal panning. To solve this, we would need to have some helper images shot from another angle. I've decided to record from another angle as well just to be on the safe side. Determining the size of the golem and framing the shot to accommodate it is also proving to be tricky.
Some rock tests were also carried out today, refining the network and look further.
I ended up multiplying the voronoi and vorley noises together for the main shape (thanks to Mr Ron for patiently explaining the functions of the add, subtract and multiply nodes!). The turbulence and curl noises were added on to create the subtler deformations on the surface.


 Closer and closer!
Some rock tests were also carried out today, refining the network and look further.
I ended up multiplying the voronoi and vorley noises together for the main shape (thanks to Mr Ron for patiently explaining the functions of the add, subtract and multiply nodes!). The turbulence and curl noises were added on to create the subtler deformations on the surface.

Worley

Multiplied Voronoi

Add Turbulence

Add Curl Noise

Monday, February 13, 2012
Week 1 Day 1
Today, I find references.
REFERENCES
Rock Golem References
REFERENCES
Rock Golem References
Rock References
Rock density is very sensitive to the minerals that compose a particular rock type. Sedimentary rocks (and granite), which are rich in quartz and feldspar, tend to be less dense than volcanic rocks. And if you know your igneous petrology, you'll see that the more mafic a rock is, the greater its density.
| Andesite | 2.5 - 2.8 |
| Basalt | 2.8 - 3.0 |
| Coal | 1.1 - 1.4 |
| Diabase | 2.6 - 3.0 |
| Diorite | 2.8 - 3.0 |
| Dolomite | 2.8 - 2.9 |
| Gabbro | 2.7 - 3.3 |
| Gneiss | 2.6 - 2.9 |
| Granite | 2.6 - 2.7 |
| Gypsum | 2.3 - 2.8 |
| Limestone | 2.3 - 2.7 |
| Marble | 2.4 - 2.7 |
| Mica schist | 2.5 - 2.9 |
| Peridotite | 3.1 - 3.4 |
| Quartzite | 2.6 - 2.8 |
| Rhyolite | 2.4 - 2.6 |
| Rock salt | 2.5 - 2.6 |
| Sandstone | 2.2 - 2.8 |
| Shale | 2.4 - 2.8 |
| Slate | 2.7 - 2.8 |
Day One
We started off today by pitching our idea to Mr Ron, our mentor, and planning the rough schedule for the different phases of our project. Mr Ron recommended us to create a story around the 3 VFX shots.Danial was then assigned to draw up the storyboards and Afiq to create the concept art for the Golem. The rest of us did some look development/research for the rocks, the golem and fracturing ground, gathering relevant photos/pictures/art from around the internet. We also worked out the different shots with Danial, trying to ensure shot continuity.
Later, I did some tests for the procedural generation of rocks and populating a mesh with them.A mountain node was used to deform the sphere to create the sharp edges and corners. Mr Ron then gave some feedback and suggested using the VOP SOP to generate the rocks using different types of noise instead.


Some shot references: http://www.youtube.com/watch?v=FG_F9uZxOKg
http://vimeo.com/13678930
http://vimeo.com/13136012
http://vimeo.com/13131812
http://vimeo.com/13123864
Rockgen: http://lghsh202.blogspot.com
Subscribe to:
Comments (Atom)